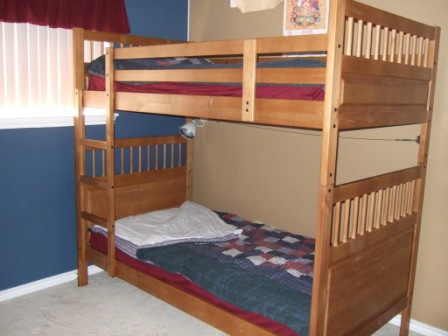
The Problem
We have 4 boys, who share 2 bedrooms. To save floor space, I opted for bunk beds with a straight ladder. When it was time to wash the sheets, I would have the older two boys strip the beds. However, putting the sheets back on was too hard for them (they were still quite young), so I had to do it. Each time I bumped my head on the ceiling or caught my finger between the mattress and the bed rail, I told myself that there had to be a better way. Sleeping bags would have been much easier, but I didn’t want them to give up the feel of sleeping between sheets. Finally, after months of bumping my head on the ceiling while putting on the clean sheets, I came up with a new bedding plan: DIY, no-sew kids’ bedrolls.
The Solution
 I put coordinating fitted sheets, which only get washed once or twice a year, on the mattresses. Then I bought king-size flat sheets and king-size lightweight quilts. Originally I used queen-sized bed clothes for the kids’ bedrolls, but as the boys got bigger, the queen-size bedrolls just didn’t cover well enough. Also, I like quilts better than comforters, but either should work well as long as they aren’t very thick.
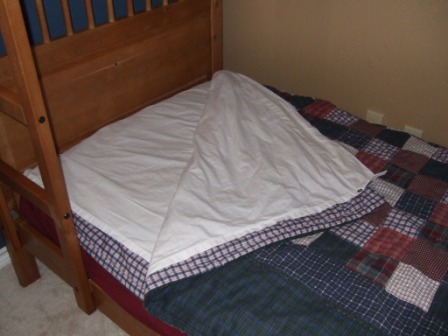
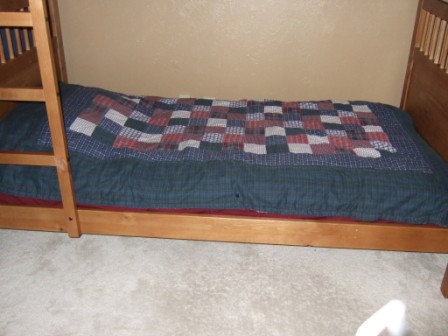
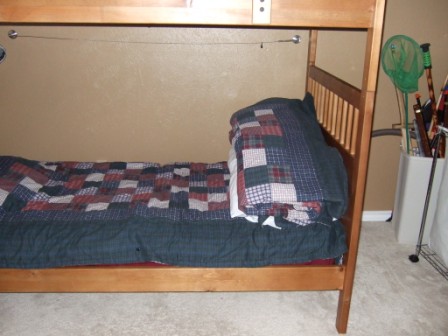
When the sheet and quilt are snapped together (see snap installation instructions below) and folded length-wise in half, the sides hang over the edge of a twin mattress by a few inches. Half of the bedroll is under the sleeping child, which provides a nice mattress pad to protect the decorative fitted sheet and the mattress, and the other half is on top. The top side edge can be unsnapped if the weather is very warm and the child only wants a sheet on top. The snaps keep the sheet in place for sleeping, and I just have the boys unsnap the sheets when it’s time to wash them. Then when it’s time to put the clean sheets on, the boys re-snap the sheets and are able to make their own beds. An additional bonus of the kids’ bedrolls is that I can do all the sheets and pillow cases in just one load of laundry.
Here’s what they look like “in use.” Note that these are pictures of the queen-size-based DIY, no-sew kids’ bedrolls, not the king-size-based that I switched to and detail below.
Tip: for the top bunk, after snapping and folding, roll the quilt/sheet into a “bedroll” which is easy to put on the top bunk and then unrolled.
When they have to double-up
My mother stayed with us over the summer, which meant we had to put all four boys in one room. Sleeping bags on the floor for a few days isn’t bad, but for months …
My solution: two twin air beds on the floor at night and stored on the top bunk during the day. The boys on the floor get to use their regular quilt/sheet sets and just make bedrolls each morning which are stored on the bottom bunk.

Instructions for making DIY, no-sew kids’ bedrolls
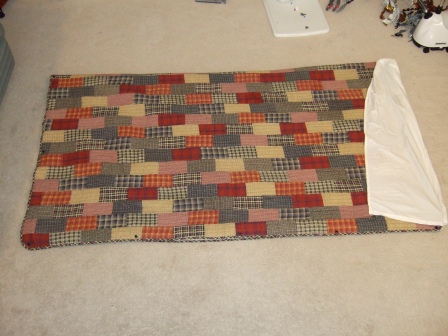
A finished bedroll using king-sized bed clothes is shown below. If you look carefully, you can see the navy snaps along the side and bottom (the sheet folds over at the top). If you haven’t attached snaps before, you might want to sacrifice a couple of snaps on some scrap material to get the hang of how they fit together before trying them on your quilt and sheet. I’m afraid that I got rather good at using a screw-driver and needle-nose pliers to remove wrong-way snaps when I made my first set of DIY, no-sew kids’ bedrolls. Erm, maybe the second time, too.
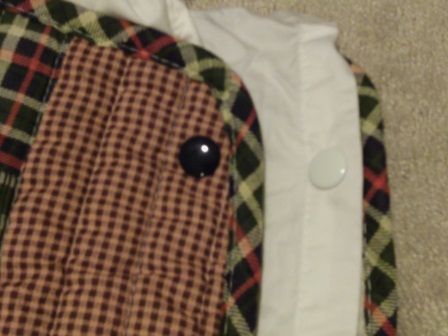
Using the Dritz Heavy Duty Snap Pliers and heavy-duty snaps, I attached 5 snaps across the bottom and 5 snaps along each side (including the snaps at the bottom corners), for a total of 13 navy snaps (to coordinate with my quilts). In the picture below, which shows the top of the top quilt and the top of the bottom sheet, note that I used white decorative caps for the sheet-side as well as the quilt-side, but you can use the plain silver posts that come with the snaps for the sheet-side. If you want decorative caps for the sheet-side, you will need to purchase the same number of snaps to coordinate with your sheets.
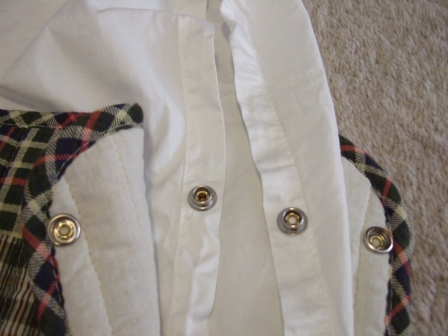
Note: Only put snaps through reinforced parts of the sheet. I placed the first snap in the middle of the bottom of the sheet and quilt. Then I placed snaps at each bottom corner. Then I placed snaps along the bottom between the middle and each corner. This does mean that there is some “bagginess” in the sheet from side-to-side, but that lets it have a little give, and it is very important that snaps are only placed on reinforced parts of the sheet. I then spread 4 snaps out along each side, allowing excess sheet to extend past the top as shown in the previous picture. Also, be prepared: it does take a good bit of pressure to attach the snaps, especially to the quilts.
Miscellaneous
I worked from the bottom-up, so the bottom of the sheet is even with the bottom of the quilt and the top of the sheet extends past the top of the quilt. This turned out to be a feature of my DIY, no-sew kids’ bedrolls, because folding the sheet over the top of the quilt helps keep the quilt clean longer. Over the years, I have had to occasionally replace snaps on the kids’ bedrolls, so don’t be surprised if you have to do that. I have wondered if it would be better to just wash the sheet and quilt together, but that would make more loads of wash.
Sorry for the fuzziness of some of the pictures!
Snap Anatomy
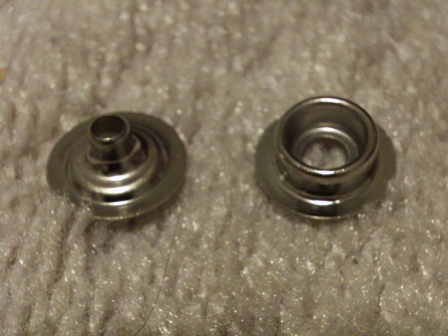
The key to making your own DIY, no-sew kids’ bedrolls is a snap. Well, a bunch of snaps, really. The heavy-duty snaps have four parts: the decorative cap, the socket, the stud, and the post (a diagram comes with the heavy duty pliers showing each part). Normally, you would attach the decorative cap and the socket to the quilt and the stud and post to the sheet, with the socket and stud “facing” each other (i.e. the socket and stud are the parts that snap together). The first picture shows, from left to right with the snaps unsnapped, the top quilt socket, the top sheet stud, the bottom sheet stud, and the bottom quilt socket. The second picture shows the decorative cap and the socket before they were attached.
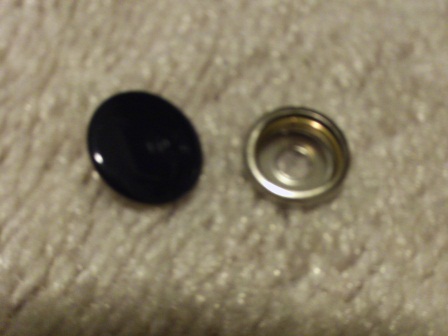
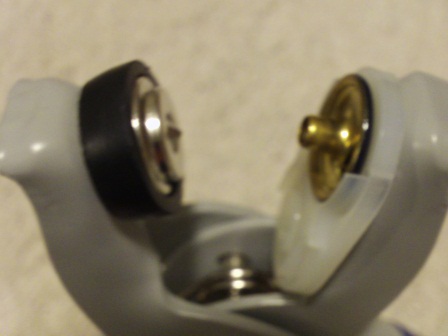
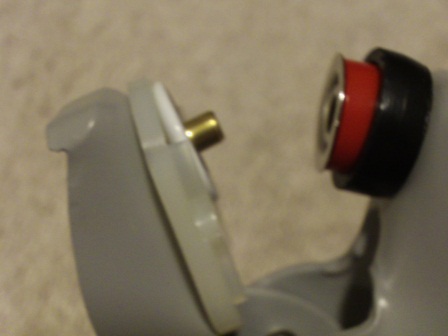
The first picture below shows the post and the stud that comes with the snap. However, the decorative cap is really just a decorative post, so if you want a more “finished” look on the sheet-side, you can purchase additional snaps and use the cap as the post for the stud (the second picture shows the cap/post and stud that I used).

I don’t know if these will be helpful, but the first picture shows the quilt cap/post and socket in the tool, and the second picture shows the sheet cap/post and stud with adapter (that comes with the tool) in the tool.
Happy snapping!


